Celebrate World Food Day with 6 Quick and Easy Bread Recipes
Celebrate World Food Day with 6 Quick and Easy Bread Recipes
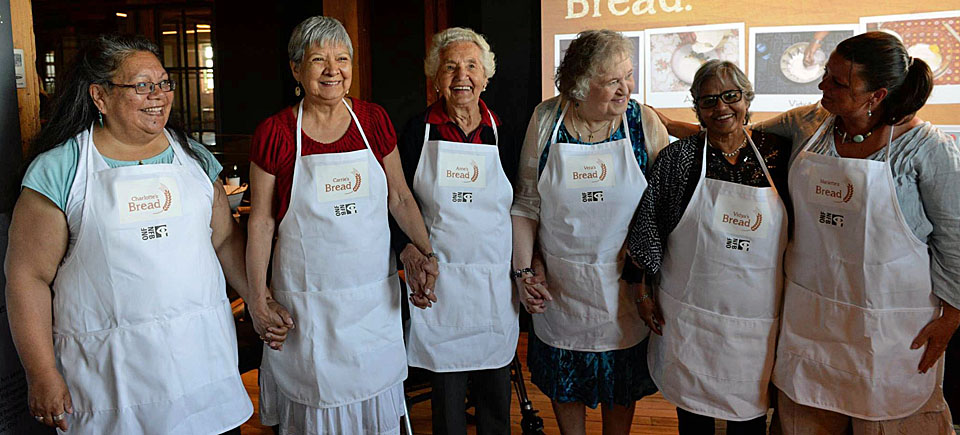
Our interactive project Bread, which launched earlier this year, introduced us to six lovely ladies from various backgrounds who all shared one passion: baking bread. An experience in human connectivity and interactive storytelling, the project beautifully echoes this quote by Cervantes: “All sorrows are less with bread.”
As each woman told her story, she prepared her signature bread and reflected on the role of baking in connecting us to our cultural and emotional wellbeing.
For World Food Day, celebrated on October 16, we are now offering the actual recipes prepared by the women of Bread. Try them out below and do tell us how your baking experiments go in the comments.
Enjoy!
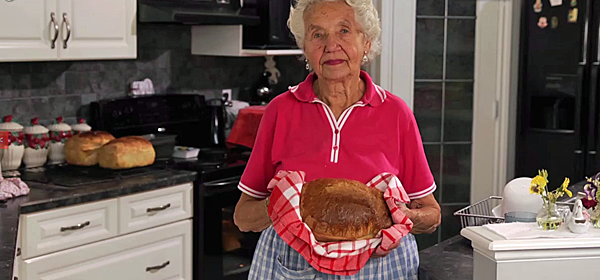
Anne’s White Bread
Makes 3 loaves
1 tsp of sugar
1 Tbsp of traditional yeast
1 Tbsp of salt
1 Tbsp of dough enhancer (optional – see footnote*)
4 cups + 1/4 cup (for yeast activation) of warm water
9 cups of all-purpose flour
1 egg (for glazing)
In a small bowl, combine the yeast, sugar and 1/4 cup of warm water. Stir just to combine and allow to stand for 10 minutes until it has activated. You’ll know the yeast is ready when little islands of foam form on top of the mixture. In the meantime, put the salt (and, if you’re using it, dough enhancer) into a large bowl. Pour in the remaining 4 cups of warm water and stir to combine.
When the yeast mixture has activated, stir it into the large bowl of water and salt. Slowly add 6 cups of the flour, working it into the liquid mixture until you have a sticky dough. Once everything has come together, pour it the dough onto a lightly-floured work surface and knead in the remaining 3 cups of flour. When the flour is completely incorporated, knead the dough for about 8 minutes until it becomes elastic and smooth. If the dough is wet after kneading it for a few minutes, lightly work in a little more flour. When the dough no longer sticks to your hands, place it in a large, lightly-oiled bowl, cover it with plastic wrap or a clean tea towel and let it rise in a warm, draft-free space for 1 1/2 – 2 hours, or until it has at least doubled in size. It should not spring back when poked.
Gently punch down the dough and divide into 3 equal pieces. Roll each piece into a rectangle approximately the size of your bread pan. Tuck excess underneath to form a parcel.
Place each parcel of dough into a lightly-buttered loaf pan, seam down. In a small bowl, whisk the egg and gently brush it over each loaf. Cover the loaves with plastic wrap or a clean tea towel and let them rise for 45 minutes – 1 hour, until the dough reaches about 1 1/2 inches from the top of the pan, and the corners have filled in. Preheat your oven to 375°F.
Bake for 30-35 minutes, until the tops of the bread are brown. Remove from pans immediately and allow to cool on a wire rack. Bread will keep on the counter in a bread bag or box for 5 days. Freeze additional loaves.
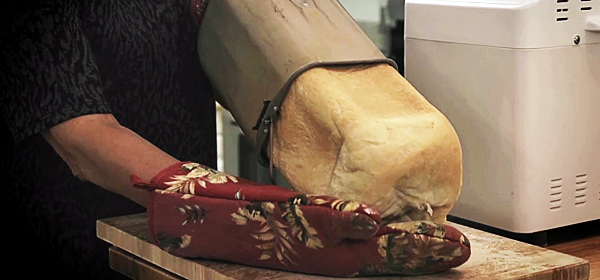
Carrie’s Bread Maker Bread
Makes 1 loaf
3/4 cup water
1 Tbsp sugar
1/2 tsp salt
1 egg
1 Tbsp of butter, melted
2 cups of white flour
2 Tbsp dough enhancer (*see footnote)
1 Tbsp of yeast
Every bread machine is different, and many modern machines have larger buckets. This recipe makes an incredible loaf, suited for the smaller bread bucket of Carrie’s 20-year-old bread machine. We’ve estimated Carrie’s bread maker to bake a 1-pound loaf, so read your own bread machine’s specifications carefully and adjust the recipe as needed. It may take some trial and error, but it’s worth it. The key to this recipe is layering the ingredients properly in the bread-maker.
First, add the water, sugar, salt, egg and butter.
Shake these ingredients together, until the egg is mixed throughout.
Sprinkle flour overtop of the liquid mixture creating a protective layer so that the top ingredients do not get wet. Add the dough enhancer and yeast, making sure that these two ingredients do not come in contact with the liquids.
Set the bread maker for your desired time, make sure to include the baking time, according to your bread maker’s directions.
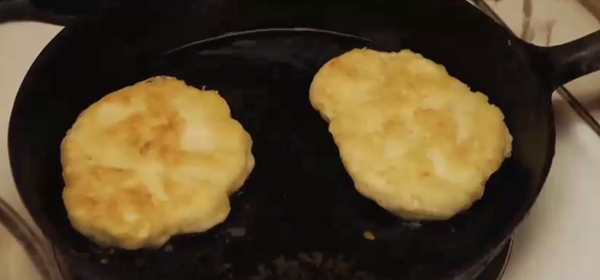
Charlotte’s Fry Bread
Makes 6 large pieces of fry bread
6 cups flour
2 Tbsp baking powder
1 tsp salt
3 cups water (more as needed)
1 cup lard or shortening (for frying)
Fry bread, like bannock, is a rich, simple bread that is easy to whip up with few ingredients. Serve with your favourite preserves or alongside a steaming bowl of stew.
Pour the flour, baking powder and salt into a large bowl and stir to combine.
Create a well in the middle of flour mixture and pour the 3 cups of water into the well. Stir with a fork until the dough starts to come together, add more water as needed (up to 1/2 cup) to form a shaggy dough.
Continue to gently mix with your fingers until the dough becomes soft and smooth. There should be some additional flour left in the bowl. Be careful to not overwork the dough or it may become tough.
Heat the lard in a cast iron frying pan, over medium-high heat.
Pull off tennis-ball-sized pieces of dough, and gently flatten them into thick discs. Tear a small hole in the centre of each disc and drop the discs, 2 at a time, into the heated lard. Wait until the fry bread starts to brown on the edges, and flip it once, allowing it brown on the other side. Pull from the pan and serve.
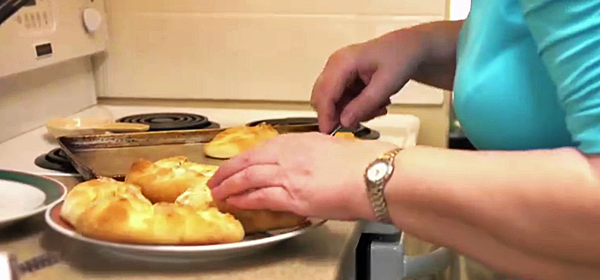
Vera’s Piroshki
Makes 6 large piroshki
Dough:
3 1/2 cups all-purpose flour
1 tsp salt
1 tsp baking powder
1/2 cup margarine
3/4 cup buttermilk
2 eggs
Topping:
3/4 cup butter, melted
Filling:
1 pound ground beef
1 large onion, finely chopped
1 Tbsp flour
1/2 cup water or broth
3 Tbsp sour cream
2 hard-boiled eggs, chopped
3 Tbsp fresh dill, chopped
salt to taste
black pepper to taste
olive oil
It seems that every culture has its own version of this stuffed bread. Vera makes hers with a simple dry cottage cheese and egg filling, and we’ve included a recipe for a more savoury version that is sure to please. Fillings can include fried ground beef and onion, Vera’s dry cottage cheese and egg, or fruit preserves.
Filling Method:
In a large skillet, over medium-high heat, brown the meat with a drizzle of olive oil. Add the onion and sauté for 10 minutes or until the meat is cooked through and the onions are translucent. Sprinkle the 1 Tbsp of flour over the meat mixture and continue cooking for another minute. Add the water and stir to create an in-the-pan sauce. Add the sour cream, stir through and then remove the mixture from the heat. Add the chopped eggs, dill, and salt and pepper to taste. Set aside.
Dough Method:
Pour the flour, salt, baking powder into a large mixing bowl. Stir the dry ingredients until well combined. Cut the margarine into the flour using a pastry cutter, or fork. In a separate bowl, whisk the eggs. Add the buttermilk and whisk to combine. Pour the egg mixture into the dry ingredients and mix into a soft dough. Cover with a clean tea towel and set aside.
Preheat oven to 400°F. Have a baking sheet on hand.
Divide the dough into 6 equal balls and, using a rolling pin, roll each into round discs. Put a dollop of your filling into the centre of each piroshki fold the dough over and pinch the edges together to seal. Place on your baking sheet. Bake for 25-30 minutes until golden.
Serve topped with melted butter or margarine or before baking, glaze with a whisked egg for a shiny finish.
Vidya’s Roti
Makes approximately 4-6 roti
1 cup whole wheat or durum flour
1/2 tsp salt
1 Tbsp cooking oil
1/2 cup of lukewarm water
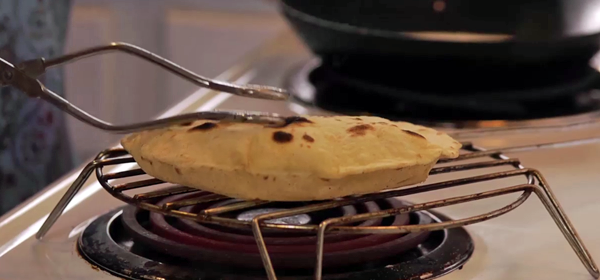
Perfecting roti takes patience and practice, but even a “failed” batch still tastes great. Some tips to get you started: don’t over-flour when rolling and though it seems counterintuitive, lightly press down on the roti with tongs after flipping to encourage the steam to form, puffing up the bread.
Pour the flour into a large mixing bowl. Stir in the salt and the oil.
Add the water a little at a time, kneading it into the flour mixture. Continue this process until it forms a nice dough. It will take about 10 minutes, and if it doesn’t come together, add extra water, one tsp at a time.
Divide the dough into 4 equal parts, and roll into balls. With a rolling pin, roll each ball into a flat round disc, about 6” in diameter. Add flour as necessary to the top of the counter to prevent the dough from sticking.
Lay a small metal cooling rack over one burner and turn it to high. On another burner, heat a non-stick frying pan over medium-high heat, and lay a roti in the pan. Allow it to cook and flip it once you see little bubbles start to form. Allow it to cook for another minute.
With the help of tongs, pick up the roti, and place it on the metal rack. Allow it to balloon up and flip again. Cook for an additional 30 seconds, or until the roti is lightly browned. Remove to a plate and smear with ghee or butter to serve.

Wilma’s Pannekoek
Makes approximately 4-6 pannekoek
1/2 cup of all-purpose flour
Pinch of salt
2 eggs
1 tsp Vanilla
2/3 cup milk
1 Tbsp butter for frying (more if needed)
This traditional Dutch meal can be made savoury or sweet, depending on the toppings added. Each cook imparts a unique swirl pattern on the versions they serve, a culinary fingerprint of sorts. The key to perfect Pannekoek is finding the right heat settings for your stovetop, a few delicious testers should get you right on track.
In a large bowl, combine the flour, eggs, and half of the milk. Mix slowly until well combined.
Slowly add the remaining milk to the batter, and continue to mix.
Heat a large frying pan over medium-high heat. Add the butter and swirl to coat the pan.
When the butter starts to sizzle, add a scoop of batter, gently swirl to create an even layer across the bottom of the pan.
Allow the Pannekoek to cook for a few minutes, until the top is no longer wet. Carefully flip the Pannekoek, look for nice browning to know that your stovetop is at the right setting. If the underside is burnt or not browned, adjust the temperature as needed. Allow the second side of the Pannekoek to cook for just 1-2 minutes, until set.
Move the finished Pannekoek to a warm plate, and continue with the rest of the batter. Smother your delicious Pannekoek with syrup, sugar, or even a hearty cheese.
—
* Footnote: A variety of dough enhancer recipes are available online, and they are also available to purchase. While a dough enhancer is certainly not
necessary for baking excellent bread, it can help with smoothness, elasticity and can increase shelf life. And, if you’re making a whole-grain dough, it can help alleviate some of the heaviness. Here’s a recipe that will yield enough for 10 loaves of bread. Stir together and store in refrigerator in an airtight container:
1 cup wheat gluten
1/2 cup skim milk powder
2 Tbsp soy lecithin granules
1 1/2 tsp citric acid or ascorbic acid power
1 1/2 tsp ginger powder (you won’t taste this)


Thank you for the bread recipes. If you have any special advice on how to make a good flaky pie crust, without using lard, I’d appreciate knowing it.